AI Code Review
How to Create a Pull Request in Azure DevOps: Step-by-Step Guide

Sonali Sood

Founding GTM, CodeAnt AI
Every production bug, broken build, and late-night hotfix usually traces back to one moment: a code change that merged without enough scrutiny.
In Azure DevOps, the pull request (PR) is that checkpoint.
It’s not just a merge button. It’s where:
Code gets reviewed
Branch policies are enforced
Builds and tests run automatically
Work items are validated
Security and quality checks gate the merge
Done well, pull requests prevent defects from ever reaching main.
Done poorly, they become bottlenecks; slow reviews, unclear feedback, merge conflicts, and policy failures that frustrate developers.
This guide walks you through exactly how pull requests work in Azure DevOps, from creating a PR (Web UI, CLI, Visual Studio, VS Code) to draft workflows, auto-complete, branch policies, troubleshooting common errors, and best practices for fast, high-quality reviews.
Whether you’re a developer opening your first PR or a team lead standardizing review workflows, this is the complete, practical breakdown. But first, let’s start from the basics understanding what is a pull request in ADO.
What is a Pull Request in Azure DevOps?
A pull request (PR) in Azure DevOps is a request to merge code changes from one branch into another in Azure Repos. It creates a structured review checkpoint where team members can inspect the diff, leave inline comments, vote to approve or reject, and verify that branch policies (required reviewers, build validation, linked work items, status checks) are satisfied before the merge is allowed. If you come from GitLab, a pull request is the same thing as a merge request, different label, same gate.
Pull requests are the primary mechanism for code review in Azure DevOps. Every PR captures a complete record of what changed, who reviewed it, what feedback was given, and when it was merged, creating an auditable history of every code change that enters your codebase.
A PR in Azure DevOps consists of:
a source branch (where your changes live)
a target branch (where you want to merge)
a title and description
linked work items from Azure Boards
assigned reviewers
inline review comments
policy evaluation results, and a merge strategy
You can create PRs through the Azure DevOps web UI, the Azure CLI, Visual Studio, VS Code, or the REST API.
Anatomy of a Pull Request in Azure DevOps
Before creating your first PR, it helps to understand what each part does and why it matters for reviewers.
PR Component | What It Is | Why It Matters for Review |
Title | One-line summary of the change | First thing reviewers see. A good title lets reviewers prioritize which PRs to review first without opening them. |
Description | Detailed explanation of what changed, why, and how it was tested | Gives reviewers the context they need to evaluate the code. Without a description, reviewers spend the first 15 minutes figuring out what they’re looking at instead of whether it’s correct. |
Source branch | The branch containing your code changes | Determines what diff the reviewers see. |
Target branch | The branch you’re merging into (usually | Determines which branch policies apply. PRs targeting |
Reviewers | Team members assigned to review the code | Required reviewers must approve before the PR can merge. Optional reviewers provide feedback but don’t block. |
Work items | Linked tasks, bugs, or stories from Azure Boards | Provides the why behind the code, what problem this PR solves. Helps reviewers assess whether the implementation matches the intent. |
Labels | Tags for categorizing PRs (e.g., | Helps teams filter and prioritize the PR queue. |
Policies | Branch policy evaluation results, build status, reviewer count, linked work items, status checks | The automated enforcement layer. If any required policy fails, the PR can’t merge regardless of reviewer approval. |
Auto-complete | Automatic merge once all policies pass | Eliminates the “everything is approved but someone forgot to click merge” problem. |
Merge type | How the source branch is integrated into the target (merge commit, squash, rebase, semi-linear) | Affects your git history. Each strategy has tradeoffs. See the merge strategies guide. |
Draft status | Whether the PR is a draft (work-in-progress) or published (ready for review) | Draft PRs don’t trigger policy evaluation or reviewer notifications, useful for early feedback without noise. |
Create a Pull Request: Web UI

This is the most common method. Works from any browser, no tooling required.
Step 1: Navigate to Pull Requests
Go to your Azure DevOps project → Repos → Pull Requests in the left sidebar. Click “New pull request” in the top-right corner. Azure DevOps also shows a Create a pull request banner right after you push a branch.
Step 2: Select branches
Choose your source branch (the branch with your changes) from the left dropdown. Choose your target branch (where you want to merge, usually main or develop) from the right dropdown.
Azure DevOps immediately shows you the diff, all files that differ between your source and target branches. Scan this quickly to make sure you’re not accidentally including unrelated changes from other branches.
Step 3: Write the title
Use present tense. Be specific. The title should tell a reviewer what the PR does without opening it.
Good Titles | Bad Titles |
|
|
|
|
|
|
|
|
Step 4: Write the description
If your repo has a PR template, it auto-populates here. Fill in every section.
If there’s no template, write at minimum:
What changed and why
How you tested it
Anything reviewers should focus on
Screenshots for UI changes
A blank PR description is the single biggest time-waster in code review. Reviewers who don’t know what they’re looking at or why take dramatically longer to review, ask more clarifying questions, and are more likely to miss real issues. Our PR template examples for Azure DevOps give you copy-paste starting points.
Step 5: Link work items
Click “Link work items” and search for the relevant Azure Boards item. Use the AB#1234 syntax in the description to auto-link. Linking work items does two things: satisfies the “Check for linked work items” branch policy (if enabled), and gives reviewers context about the business intent behind the change.
Step 6: Assign reviewers
Add team members who know the code area. Azure DevOps supports two types:
Required reviewers: must approve before the PR can merge (set via branch policies or manual assignment)
Optional reviewers: provide feedback but don’t block the merge
If your team has auto-reviewer policies configured in branch policies, reviewers may be added automatically based on file paths or code ownership rules.
Step 7: Add tags (optional)
Add tags to categorize the PR: bug, feature, hotfix, tech-debt, documentation. Tags help teams filter the PR queue (the CLI and REST API still call them labels), a reviewer scanning 20 open PRs can quickly find the ones relevant to their area.
Step 8: Create (or Create as Draft)
Click “Create” to publish the PR and notify reviewers. Branch policies begin evaluating immediately (build validation kicks off, required reviewer checks activate, linked work item checks run).
Click “Create as draft” if the PR isn’t ready for formal review yet (see Draft PRs vs. Published PRs below).
Create a Pull Request: Azure CLI
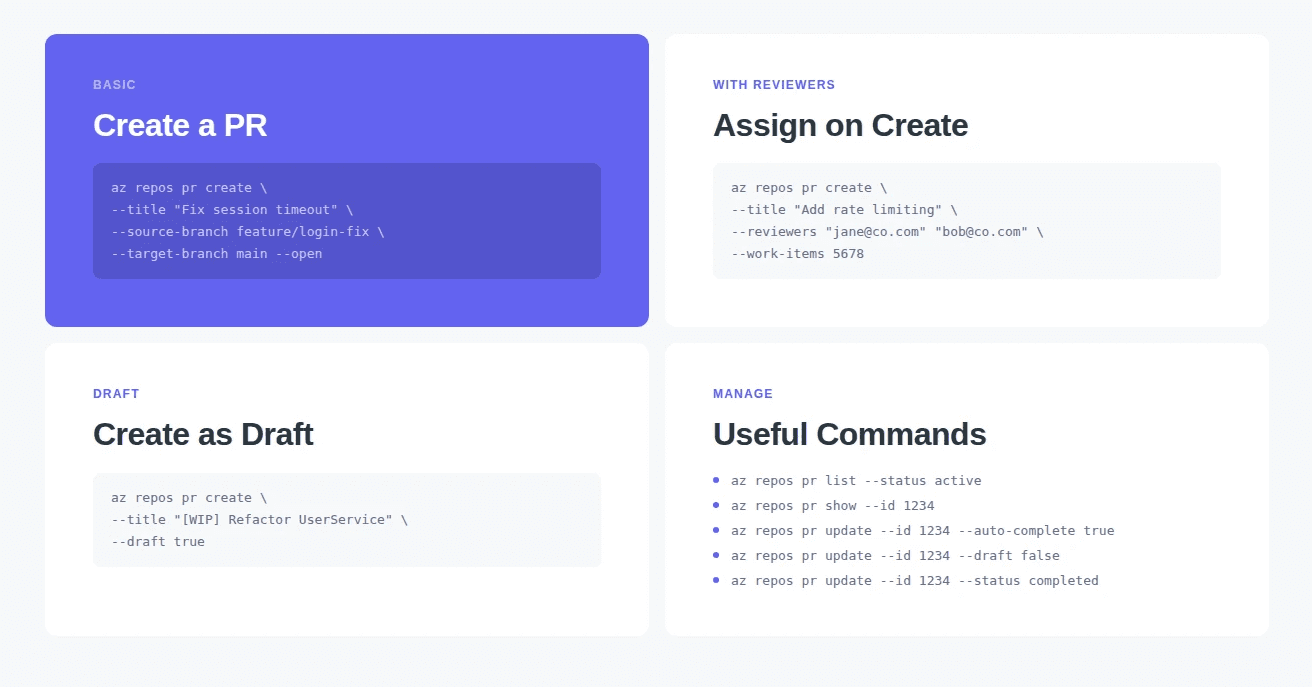
The Azure CLI method is faster for developers who live in the terminal. It’s also scriptable, useful for automating PR creation in pipelines or CI workflows.
Prerequisites
Install the Azure CLI and the Azure DevOps extension:
Create a basic PR
Create a PR with reviewers
Create a draft PR
Useful PR management commands
Create a Pull Request: Visual Studio
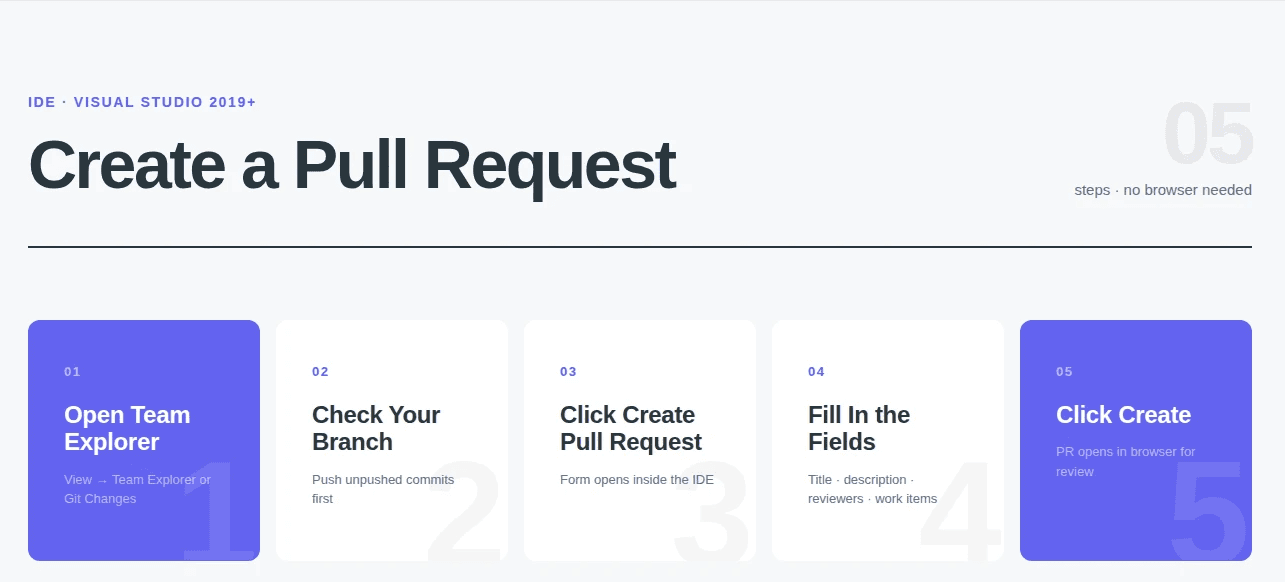
For teams using Visual Studio 2022 with Azure Repos, you can create PRs directly from the IDE without switching to the browser.
Step 1: Open Git Changes (View → Git Changes) or the post-push banner that appears after you push.
Step 2: Ensure you’re on the branch you want to create a PR from. Push any unpushed commits.
Step 3: In the Git Changes window, or from the Git menu under GitHub/Azure DevOps, click “Create Pull Request.” This opens a PR creation form within Visual Studio.
Step 4: Fill in the title, description, reviewers, and work items, the same fields as the web UI.
Step 5: Click “Create” to publish the PR, or use Create as Draft on Visual Studio 17.12 and later.
Visual Studio opens the PR in your browser after creation, where you can see the full diff and policy status. Embedded in-IDE review, votes, and completion are still rolling out, with parts behind preview flags.
Create a Pull Request: VS Code
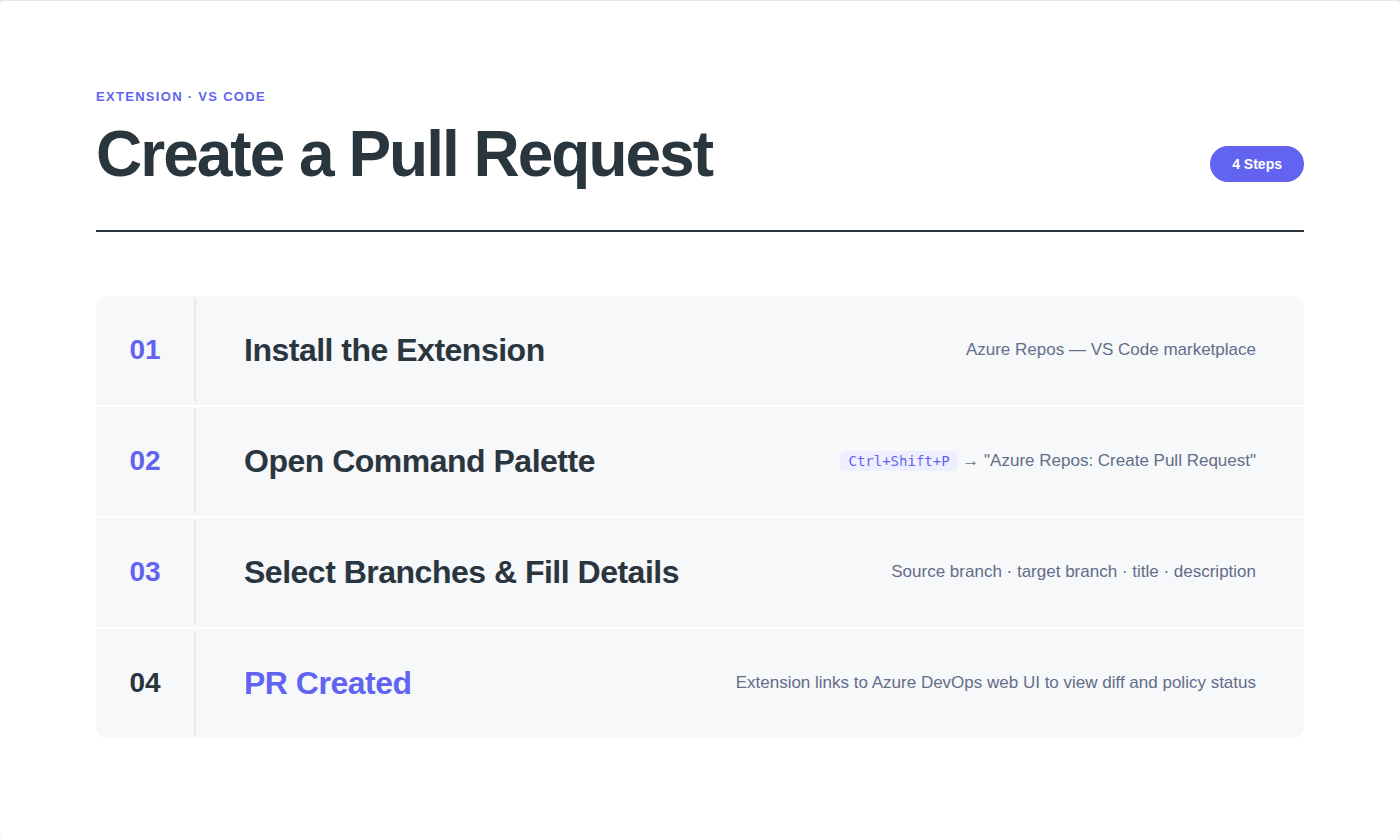
The official Azure Repos extension for VS Code was retired from the marketplace in November 2020, so skip any guide that tells you to install it. You still have three good options.
Fastest path: run az repos pr create --open from the integrated terminal. It creates the PR and opens it in your browser.
Community extension: install AzDO Pull Requests (ankitbko.vscode-pull-request-azdo) to create and review PRs in-editor. It is third-party, not Microsoft-maintained.
Web hand-off: push your branch, then click the Create a pull request banner Azure DevOps shows for recently pushed branches.
Tip: set az devops configure --defaults organization=… project=… once, and every later az repos command gets shorter.
Draft PRs vs. Published PRs
Azure DevOps supports two PR states at creation: draft and published. Understanding when to use each can improve your team’s review workflow.
Draft PR | Published PR | |
Reviewer notifications | Required and auto-included reviewers are not added, but reviewers you add explicitly do get notified | Yes, reviewers get email/Teams notifications |
Branch policy evaluation | Build validation can be queued manually; other policies wait for publish | Yes, build validation, required reviewers, and all policies evaluate immediately |
Voting | Comments allowed. Switching a published PR back to draft clears all votes | Reviewers can vote |
Merge | Cannot be merged while in draft state | Can be merged once all policies pass |
Visibility | Visible in the PR list with a “Draft” badge | Visible in the PR list as active |
When to Use Draft PRs
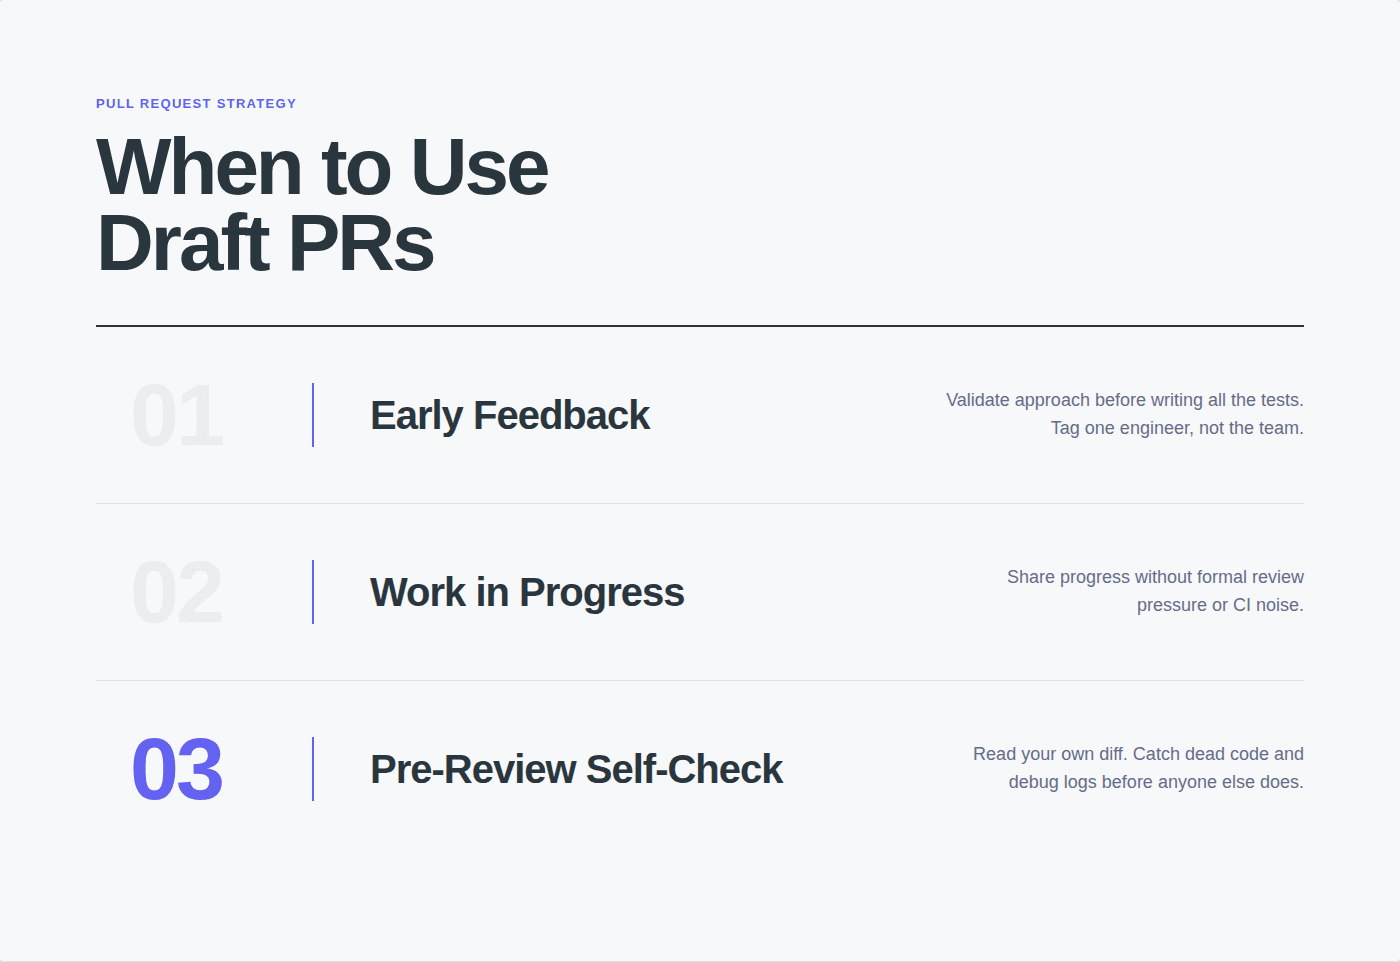
Early feedback on approach. You’re refactoring a service and want to validate your approach before writing all the tests. Create a draft PR, tag one senior engineer, and ask: “Does this direction make sense before I go further?” No notifications sent to the full team, no builds wasting CI minutes.
Work-in-progress sharing. You’re working on a feature over several days. A draft PR lets teammates see your progress, understand what you’re building, and offer suggestions, without the pressure of a formal review or the noise of policy evaluation.
Pre-review self-check. Create a draft PR just to see your own diff in the Azure DevOps UI. Reading your changes in the PR view (rather than your IDE) often surfaces issues you missed, dead code, debug logs, incomplete error handling. Publish the PR once you’ve self-reviewed.
When to Publish Immediately
The change is ready for review: If you’ve already self-reviewed, written tests, and the code is in a mergeable state, skip the draft and publish directly. Draft-then-publish adds an unnecessary step.
Hotfixes: During incidents, you want reviewer notifications to fire immediately. Don’t use draft for anything time-sensitive.
Small changes: A one-file config update or a documentation fix doesn’t need the draft workflow. Publish, get a quick approval, merge.
Publishing a Draft PR
When a draft PR is ready for review, click “Publish” in the PR header (web UI) or run:
az repos pr update --id 1234 --draft false
This triggers reviewer notifications, starts branch policy evaluation, and enables voting. The PR transitions from draft to active.
Auto-Complete: Set it and Forget it

Auto-complete is one of the most underused features in Azure DevOps. When enabled on a PR, Azure DevOps automatically merges the PR the moment all branch policies are satisfied, no manual “Complete” click required.
How Auto-Complete Works
A developer creates a PR and enables auto-complete
Branch policies evaluate: build validation runs, required reviewers are notified, linked work items are checked
As each policy passes, Azure DevOps checks: “Are ALL policies satisfied now?”
The moment the last policy passes (e.g., the second required reviewer approves), Azure DevOps immediately merges the PR using the configured merge strategy
The source branch is optionally deleted (if “Delete source branch” was selected)
Setting Up Auto-Complete
Web UI: After creating a PR, click the dropdown arrow next to the “Complete” button and select “Set auto-complete.” You’ll be prompted to configure:
Merge type (merge commit, squash, rebase, or semi-linear)
Whether to delete the source branch after merge
Whether to complete linked work items (transition them to “Done” or “Closed”)
An optional completion message (merge commit message)
CLI:
When to Use Auto-Complete
Scenario | Use Auto-Complete? | Why |
Standard feature PRs | Yes | Eliminates the “everything approved but nobody merged” lag. The merge happens within seconds of final approval. |
PRs requiring manual deployment steps | No | If you need to coordinate the merge with a deployment, don’t auto-merge, you need to control timing. |
PRs to release branches with deployment pipelines | Depends | If your pipeline auto-deploys on merge to |
Hotfixes | Yes | During incidents, every minute counts. Auto-complete eliminates the manual merge step. |
Draft PRs | N/A | Auto-complete can be set but won’t trigger until the PR is published and all policies pass. |
Auto-Complete with Vote Reset
If your branch policies include a vote-reset policy, now a four-option “When new changes are pushed” setting that can reset all votes or only approvals, be aware that auto-complete respects this policy. If a reviewer approves, the author pushes new commits, and votes are reset, auto-complete pauses until the reviewer re-approves. This ensures that auto-merge never happens on code that hasn’t been reviewed in its final state.
PR Author Checklist (Copy-Paste)
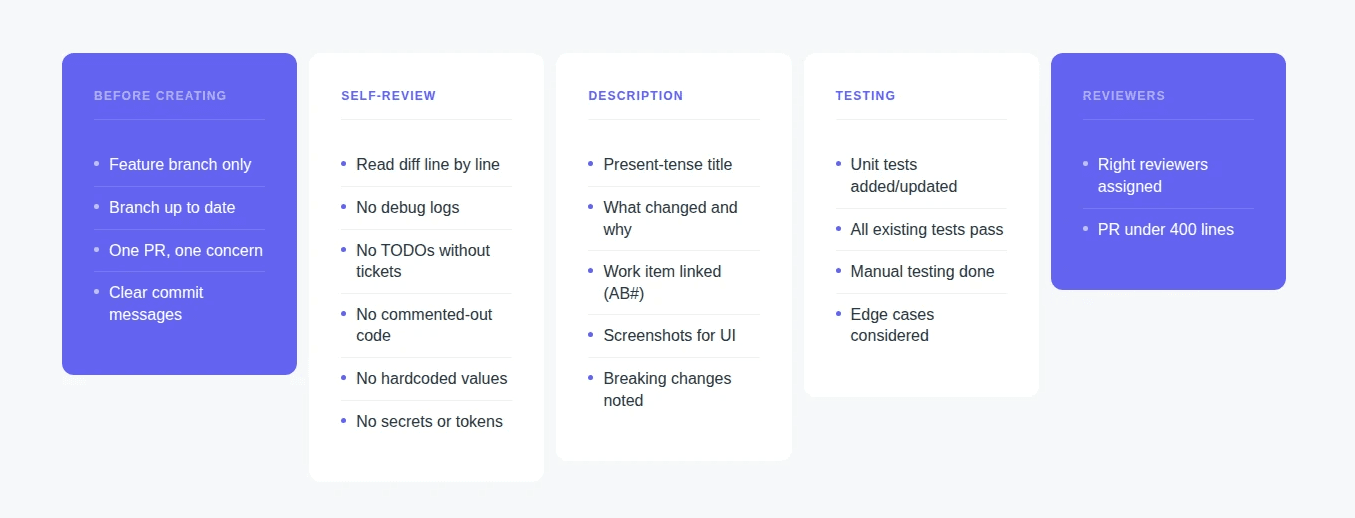
Use this checklist before creating or publishing any PR. Paste it into your PR description or use it as a mental checklist before clicking “Create.”
## Before Creating This PR
-[ ] Changes are on a feature branch (not committing directly to main)
-[ ] Branch is up to date with the target branch (rebased or merged latest)
-[ ] All changes are related to one purpose (one PR = one concern)
-[ ] Commit messages are clear and descriptive
## Self-Review
-[ ] I read my own diff line by line
-[ ] No debug logs, console.logs, or print statements left in
-[ ] No TODOs without linked tickets
-[ ] No commented-out code
-[ ] No hardcoded values that should be config/environment variables
-[ ] No secrets, tokens, or credentials in the code
## Description & Context
-[ ] Title is specific and uses present tense
-[ ] Description explains what changed and why
-[ ] Work item is linked (AB# syntax)
-[ ] Screenshots included (for UI changes)
-[ ] Breaking changes are documented
## Testing
-[ ] Unit tests added or updated for new/changed logic
-[ ] All existing tests pass locally
-[ ] Manual testing completed for the affected area
-[ ] Edge cases considered (null inputs, empty lists, concurrent access)
## Reviewers
-[ ] Correct reviewers assigned (people who know this code area)
-[ ] PR size is reasonable (<400 lines of change; split if larger)
How to Review a Pull Request in Azure DevOps
Creating a PR is half the workflow. Here’s the review side, what a reviewer does from notification to vote. Worth knowing, the summary view truncates at 0.5 MB, diffs at 5 MB, and a PR caps out at 1,000 reviewers.
Step 1: Read the Overview First
Open the PR and read the Overview tab before looking at any code. Understand:
What the PR does (title + description)
Why it exists (linked work items)
How it was tested (description or checklist)
What the author wants you to focus on (reviewer notes)
Skipping the overview and jumping straight to the diff is the most common review mistake. You end up spending 10 minutes reverse-engineering the intent from the code instead of 30 seconds reading the description.
Step 2: Review the Diff
Switch to the Files tab. Azure DevOps shows the diff for every changed file. You can toggle between:
Inline view: old and new code interleaved (better for small changes)
Side-by-side view: old on the left, new on the right (better for large refactors)
Review files in a logical order, start with the core logic files, then tests, then configuration. Don’t review in the default alphabetical order.
Step 3: Leave Inline Comments
Click on any line in the diff to leave a comment. Write comments that are specific and actionable:
Effective Comment | Ineffective Comment |
“This query runs inside a loop, it’ll execute N times per request. Consider batching with | “This needs work” |
“Missing null check on | “What about null?” |
“Nice approach to the caching layer, much cleaner than the previous implementation” | (saying nothing, positive feedback matters too) |
Step 4: Vote
Use the vote dropdown next to the Approve button:
Vote | What It Means | When to Use |
Approve | Code is good to merge | No issues found, or only trivial suggestions |
Approve with suggestions | Mergeable, but here are improvements for the author to consider | Non-blocking feedback. The author can merge without addressing these. |
Wait for author | Needs changes before this is mergeable | Bugs, missing tests, unclear logic, or security issues that must be fixed |
Reject | Fundamentally wrong approach, needs to be rethought | Rarely used. Only for serious architectural or directional problems. |
Step 5: Follow Up
If you voted “Wait for author,” check back when the author pushes updates. Verify the fixes address your feedback. If your branch policies reset votes on new pushes, you’ll need to re-review and re-vote.
How Do You Update a Pull Request After Feedback?
Push new commits to the source branch and the PR updates automatically, no reopening needed. Votes reset according to the When new changes are pushed policy, and reviewers can diff iteration to iteration from the Updates tab.
Requesting GitHub Copilot as a Reviewer (Preview)
As of July 2026, Copilot code review for Azure Repos is in limited public preview. You request GitHub Copilot from the Reviewers section like any human reviewer, and it comments within minutes.
Copilot always reviews as a comment-only voter, so it never satisfies required-reviewer policies and never blocks a merge. Billing runs through GitHub AI credits on the linked Azure subscription rather than a Copilot license.
Preview limits are real. Reviews cap at 100 changed files, repos at 10 GB, and there is no automatic re-review on new pushes. Sign-up rounds closed July 3, 2026, with access rolling out in waves. CodeAnt AI is GA on both Azure DevOps cloud and Server today if you need votes and quality gates that policies can enforce.
Troubleshooting Common Pull Request Issues
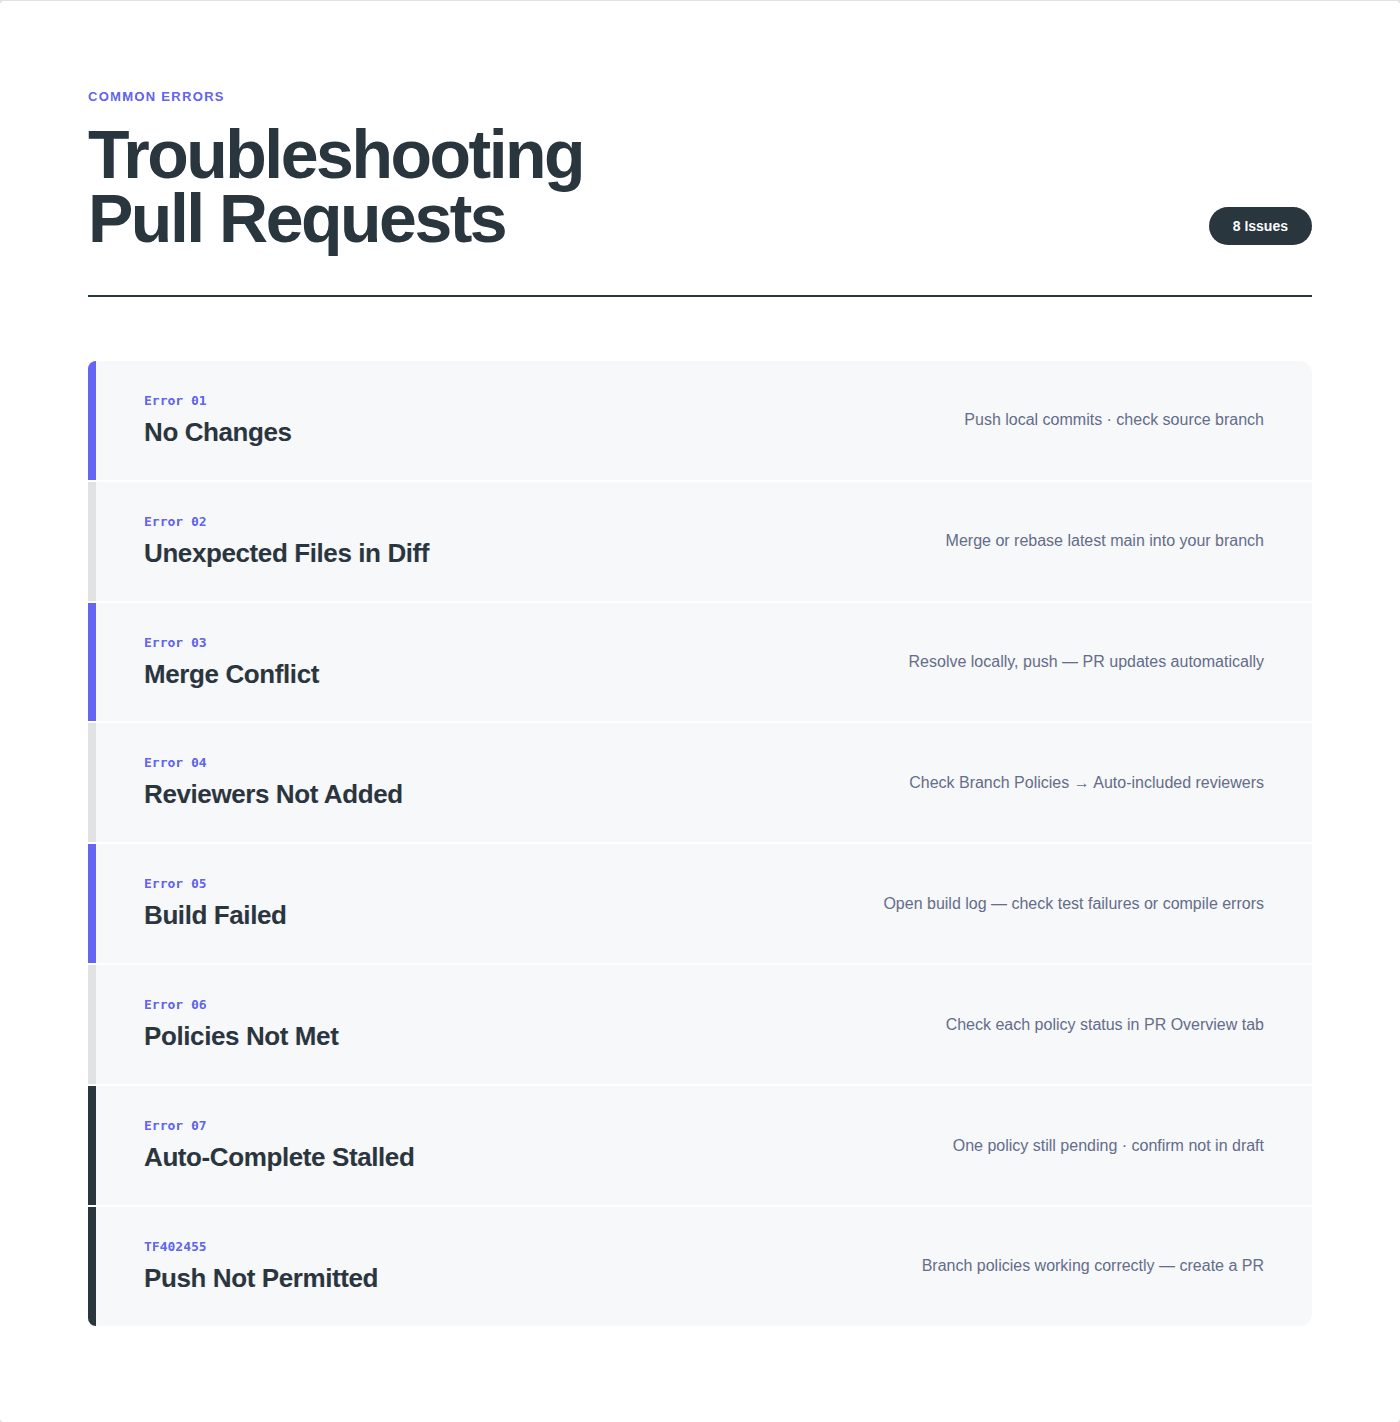
“I can’t create a PR, getting ‘There are no changes’ error”
This means your source branch and target branch are identical, there’s no diff. Common causes:
You forgot to push your local commits. Run
git push origin <your-branch>and try again.You’re creating a PR from the wrong branch. Check that your source branch selector is correct.
Your branch was already merged. Check the completed PRs list, it might already be there.
“PR shows files I didn’t change”
Your feature branch may be behind the target branch. If main has moved forward since you branched off, the diff shows both your changes and the difference between your branch’s starting point and current main. Fix it by merging the latest target branch into your branch:
git checkout feature/your-branch
git pull origin main
git push origin feature/your-branch
Or rebase:
git checkout feature/your-branch
git rebase origin/main
git push --force-with-lease origin feature/your-branch
“PR says ‘Merge conflict’ and I can’t complete it”
Your source branch has changes that conflict with changes on the target branch. Azure DevOps can resolve some conflicts in the web UI (click “Resolve conflicts”), but for complex conflicts you’ll need to resolve locally:
git checkout feature/your-branch
git pull origin main
# Resolve conflicts in your editor
git add .
git commit -m “Resolve merge conflicts with main”
git push origin feature/your-branch
The PR will update automatically after you push the resolution.
“Reviewers aren’t being added automatically”
Check branch policies. See our Azure DevOps branch policies guide.
Auto-reviewers are configured in Repos → Branches → ⋮ → Branch policies → Automatically included reviewers, or Project Settings → Repository → Policies.
If this isn’t configured, reviewers must be added manually on each PR. Also check if you have a CODEOWNERS-equivalent configuration, Azure DevOps uses the “Automatically included reviewers” policy with path filters to achieve code ownership.
“Build validation failed but I don’t know why”
Click the failed build link in the PR’s policy section. This opens the Azure Pipelines build log. Common causes:
Unit test failure, the build log shows which test failed and the assertion message
Compilation error, check the build log for error messages
Pipeline timeout, large repos or slow tests may exceed the pipeline timeout
Infrastructure issue, the build agent may be unavailable (check agent pool status)
“I approved but the PR still says ‘Not all policies are met’”
Your approval is one policy, but there may be others blocking:
Build validation: the CI build hasn’t passed yet (or hasn’t started)
Minimum reviewer count: the policy requires 2 reviewers but only 1 has approved
Linked work items: no work item is linked to the PR
Comment resolution: there are unresolved comments on the PR
Status checks: an external status check (like CodeAnt AI) hasn’t reported yet
Check the policy section at the bottom of the PR Overview tab, each policy shows its current state (passed, failed, or pending).
“I set auto-complete but the PR isn’t merging”
Auto-complete only triggers when ALL policies pass simultaneously. If one policy is still pending (e.g., a reviewer hasn’t approved yet, or a build is still running), auto-complete waits. Check the policy section to see which policy is blocking. Also verify that the PR isn’t in draft mode, draft PRs can’t auto-complete.
“Error: TF402455: Pushes to this branch are not permitted”
This means branch policies are blocking direct pushes to the target branch (usually main). This is expected behavior, it means your team has configured branch protection correctly. The solution is to create a PR instead of pushing directly. This error confirms that your branch policies are working.
Best Practices for Effective Pull Requests
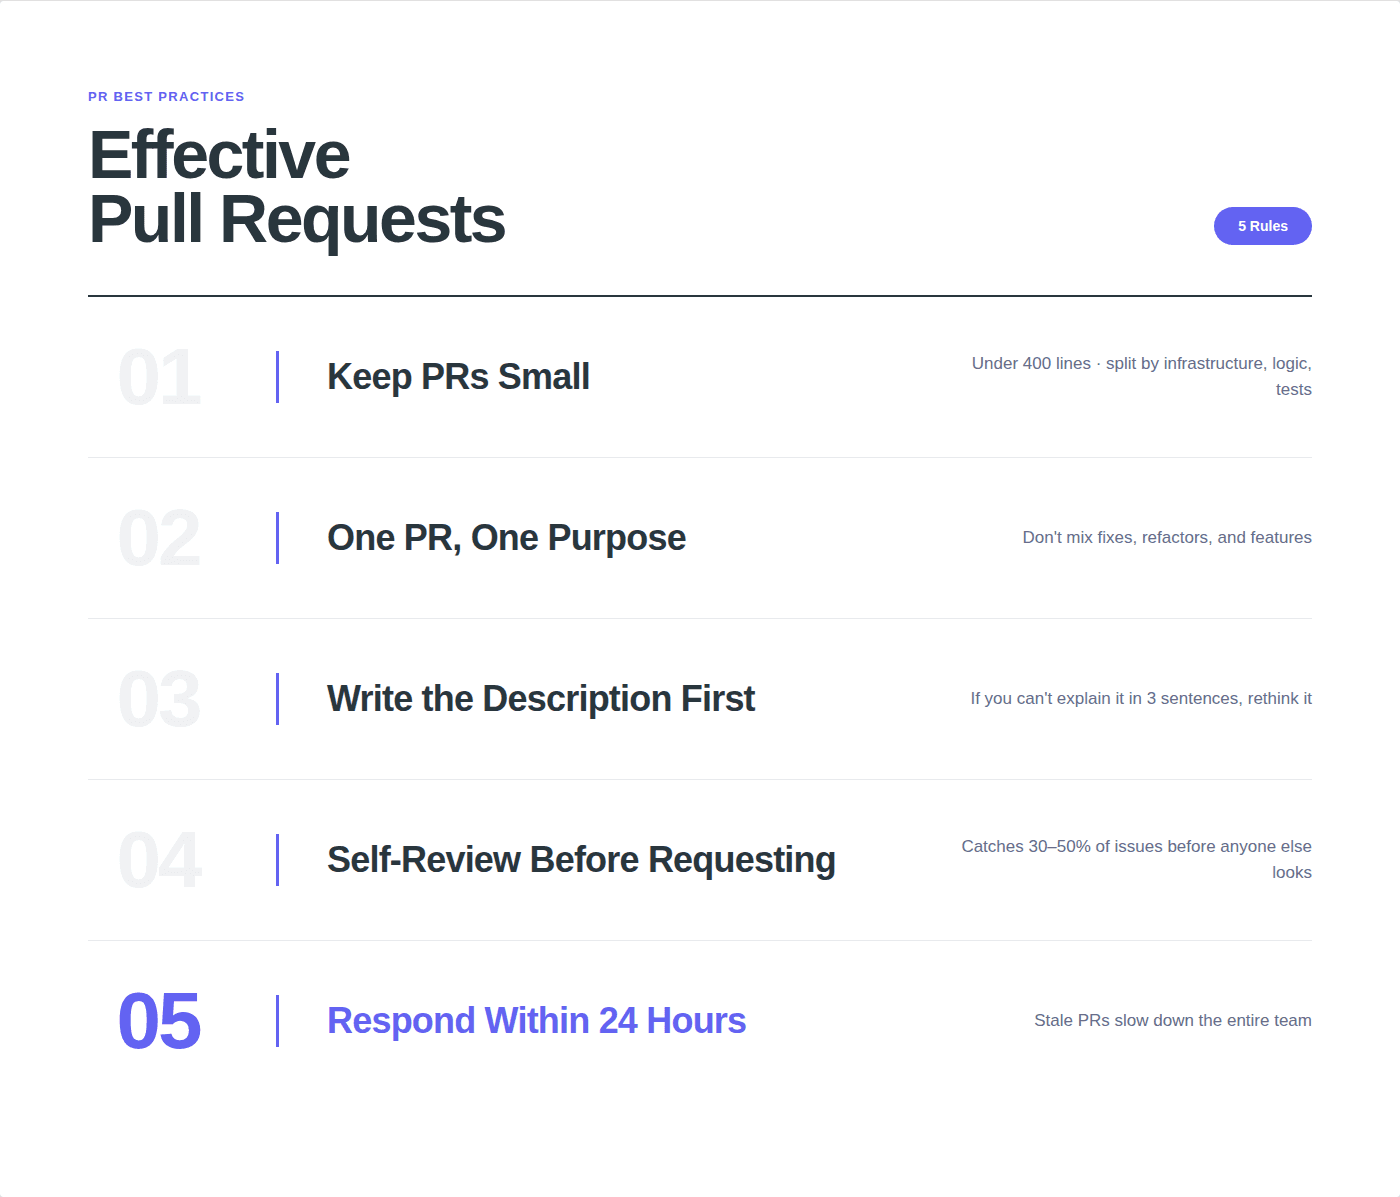
Keep PRs small
PRs around 400 lines or less get reviewed faster and more thoroughly, the ceiling SmartBear’s peer-review research famously landed on. If your change is large, split it into logical chunks, infrastructure first, core logic second, tests third.
One PR, one purpose
Don’t mix a bug fix with a refactor with a new feature. Each PR should do one thing. This makes review easier, rollback safer, and git history more useful.
Write the description before the code
If you can’t explain what your PR does in 3 sentences, you may not have a clear enough understanding of the change. Writing the description first forces you to articulate the plan.
Self-review before requesting review
Create the PR, read your own diff in the Azure DevOps UI (it looks different than in your IDE), and catch the obvious issues yourself. This shows respect for your reviewers’ time and catches a meaningful share of issues before anyone else looks at it.
Respond to feedback within 24 hours
Stale PRs with unanswered feedback slow down the entire team. Even if you can’t fix everything immediately, acknowledge the feedback and provide a timeline.
For a comprehensive guide to code review workflows in Azure DevOps, including branch policies, merge strategies, team-size configurations, and AI-assisted review, see the complete code review guide. Read the complete code review guide for Azure DevOps. For squash vs rebase decisions, see the merge strategies guide.
Automate PR Review with CodeAnt AI
PR creation is the starting point. What happens next, the actual review, is where most teams hit bottlenecks. Reviewers are busy, feedback is inconsistent, and security issues slip through.
CodeAnt AI automates the mechanical layer of PR review in Azure DevOps. When a PR is created or updated, CodeAnt AI automatically:
Posts inline review comments on the PR diff, covering logical flaws, business logic errors, critical code flaws, performance issues, and best practices
Runs security scanning (SAST, SCA, IaC, secrets detection) with Steps of Reproduction showing the full attack path for every finding
Auto-generates PR descriptions and summaries from the diff and linked work items, solving the blank-description problem at the source
Validates that PR changes align with the scope of the linked work item (ticket scope review)
Posts a quality gate status check that branch policies can gate on
CodeAnt AI works on both cloud Azure DevOps and self-hosted Azure DevOps Server. For setup instructions, see the cloud setup guide or self-hosted setup guide. For how the full AI review pipeline works under the hood, see AI Code Review in Azure DevOps.
You can also install the CodeAnt AI extension for Azure DevOps straight from the Visual Studio Marketplace.
If you want your pull requests to be more than a merge formality, and actually become an intelligent quality gate, this is where automation makes the difference. Related reading: how reproduction steps work in AI code review.
Book a 30-minute demo to see CodeAnt AI running inside Azure DevOps PRs.
FAQs
What is a pull request in Azure DevOps?
How do I create a pull request in Azure DevOps?
What’s the difference between a draft PR and a published PR?
What is auto-complete in Azure DevOps?
How many lines of code should a pull request be?